Have you tried the Abobe ACR Super Resolution yet? It is awesome! It increases the pixel count 400%. Enhance allows you to increase image quality for making large prints or increasing the resolution of a cropped image. It is coming to Lightroom "soon" (soon is Adobe's timeframe, stated in March), but for now, right click, edit in, open smart object in Photoshop which will open the file in ACR).
Bottom line: Work well and it is Better, Faster, and Easier (workflow wise) than Topaz Gigapixel.
Why/When use Abobe ACR Super Resolution?
-- for older cameras with less megapixels
-- to crop an image to get bigger birds/subjects
"Super Resolution, introduced in Camera Raw 13.2, helps create an enhanced image with similar results as Raw Details but with 2x the linear resolution. This means that the enhanced image will have 2x the width and 2x the height of the original image, or 4x the total pixel count. This feature supports the same file types as Raw Details, plus additional file types such as JPEG and TIFF. Super Resolution is especially useful to increase the resolution of a cropped image." https://helpx.adobe.com/camera-raw/using/enhance.html
Tip -- If you want to go make your image 4x the size of your original size, open the file in ACR, save the dng (2x) and then re-open it in Adobe Camera Raw and run the enhance feature again on this saved copy (you can’t just run it again in Camera Raw without opening it and saving it again).
I compared Abobe ACR Super Resolution to Topaz Gigapixel, which I have used in the past and it works, but it is clunky and slow. Workflow wise Topaz Gigapixel does not interpret RAW files well, so I have to open the file in ACR and save it as a TIFF and then open it in Topaz Gigapixel, takes a while to process. See our comparisons below.
The new Abobe ACR Super Resolution is easy -- built right into ACR (right click and click enhance and check Super resolution) and it creates a dng file.
Note: Starting with Adobe Camera Raw 13.2 (March 2021 release), Enhance Details is renamed to Raw Details.
Enhance provides a set of features such as Raw Details and Super Resolution to help improve image quality using Camera Raw.
Raw Details, previously called Enhance Details produces crisp detail and more accurate renditions of edges, improves color rendering, and also reduces artifacts. The resolution of the enhanced image stays the same as the original image. This feature is especially useful for large displays and prints, where fine details are visible. The supported file types are raw files.
Super Resolution, introduced in Camera Raw 13.2, helps create an enhanced image with similar results as Raw Details but with 2x the linear resolution. This means that the enhanced image will have 2x the width and 2x the height of the original image, or 4x the total pixel count. This feature supports the same file types as Raw Details, plus additional file types such as JPEG and TIFF. Super Resolution is especially useful to increase the resolution of a cropped image.
When you click super res you will see it processing and end up with a Digital Negative (DNG) RAW file.
FYI, any edits/adjustments that you made to the source photo will automatically be applied to the enhanced DNG and you can edit the enhanced DNG just like any other photo.
FYI, Right now it is only in ACR (Adobe Camera RAW) and not accessible via the filter camera RAW. It is coming to Lightroom soon.
FYI, You can use Super Resolution on a JPG file, you just need to make sure that your ACR is set to open JPGs (see Figure 5 below)
FYI, It is coming to Lightroom "soon" (soon is Adobe's timeframe, stated in March), but for now, right click, edit in, open smart object in Photoshop which will open the file in ACR).
How to use and find Super Resolution.
Figure 1. Open your RAW or JPG file in ACR (when you open a RAW file in Photoshop it automatically opens in ACR, but for a JPG file to open in ACR you must change a file handling setting, sett Figure 5). Right click (PC, or Control click MAC) and then select Enhance (PC shortcut Ctrl Sh D).
Figure 2. From the filmstrip select one or multiple images and click on the three dots and then enhance shortcut Ctrl Shift D on a PC. The pixels will increase 2X width and height for 4X image size. This means that if you significantly crop a small subject (birds always seem smaller on the computer than when you were photographing them, lol) and still have a lot of pixels left.
Figure 3. RAW files from most cameras and JPG files can be enhanced using Super Resolution (circled here in red). Note that RAW details (greyed out here for this JPG file) can only use used on RAW files.
Figure 4. If you are only opening one file at a time and do not have the filmstrip enabled click on the icon in the bottom (circled here in red) to enable the filmstrip.
Figure 5. If you want to use Super Res on a JPG file make sure that your ACR is set to open JPGs. Open ACR, click on the gear upper left (circled here in red), and then click on file handling (circled here in red) and drop down to open JPGs in ACR (circled here in red)
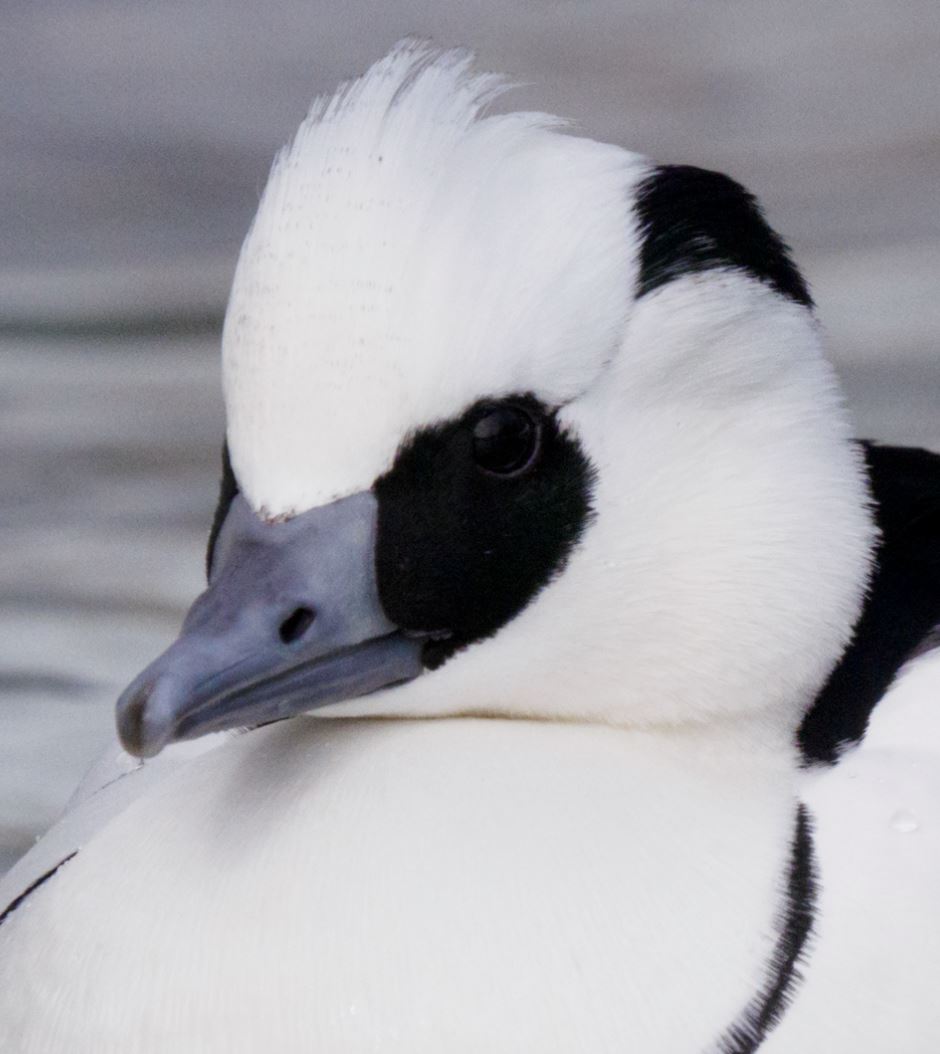
I cropped a lot of the pixels to crop in on this 5184 x 3888 Smew photo to 3533 x 2826.
5184 x 3888 Smew photo to 3533 x 2826 cropped.
After I used Enhance Super Res and cropped I had 7275 x 5820 pixels!
Cropped the 5184 x 3888 photo to 3533 x 2826 (top)
enlarged in PS 7275 x 5820(middle)
Enhance Super Resolution 7275 x 5820(bottom)
At 100%
Top Left: cropped 5184 x 3888 to 3533 x 2826
Lower Left: GigalPixel 7275 x 5820
Upper Right Transformed in PS to 7275 x 5820
Lower Right Enhance SuperResolution 7275 x 5820
At 50%
Top Left: cropped 5184 x 3888 to 3533 x 2826
Lower Left: GigalPixel 7275 x 5820 (notice the chromatic aberration)
Upper Right: Transformed in PS to 7275 x 5820
Lower Right: Enhance SuperResolution 7275 x 5820
cropped 5184 x 3888 to 3533 x 2826
Transformed in PS to 7275 x 5820
Enhance SuperResolution 7275 x 5820
You can especially notice the pattern of the feathers on the top of his head.
In this example, the Topaz Gigapixel is not as sharp and has more chromatic aberration.
Gigapixel did OK from a TIFF but did not interpret the RAW file well.
Enhance yielded the best results


