Tom and I are making the best of this 'Stay at Home' directive by viewing it as our "Artist in Residence" period
We are staying inside and doing our part to flatten the curve by creating images with humor, creativity and/or beauty. Check out some of the images that we have created in March here:
https://www.photographybylisaandtom.com/Creative/Spring2020-Artist-in-Residence/
Lightpainting is a lot of fun! And even more so with LiveTime and Live Composite on our Olympus cameras. With LiveTime and Live Composite you can SEE the Night, star, lightpainted, etc. image developing on the back of the LCD, you follow the histogram and the exposure builds, both of which make lightpainting and night photography more FUN -- and more productive!
LiveTime is sort of like Bulb mode meets Polaroid, where you can see the histogram and the image develop on the back of the camera.
LiveComposite is like Bulb Photoshop meets Bulb mode meets LiveTime, like LiveTime, you see the histogram and the image develop on the back of the camera. But better than LiveTime, you expose a base exposure first (for the ambient light) and then you keep exposing one frame at a time adding only NEW light. This is perfect for night scenes where there is street lights, light pollution, a lighthouse, etc. -- and also great for lightpainting inside or outside. I can lightpaint in my house in the middle of the day. The first image is a half-second image and then, no matter how long I expose for, I do not get any more ambient light.
Live composite. This was taken in the middle of the day, so I set the interval time to a half-second. ISO 200. f11 This image was 115 half-second images stacked on lighten blend mode in-camera. I was painting with a flashlight during the exposure, making sure to have the light at a 90 degree angle to get as much texture as possible. The resulting image takes on a painterly, Rembrandt-y feel.
The mushroom itself was chosen because it was interesting looking, but the above light painted version has a lot more texture and appeal.
For this image, I duplicated the lightpainted mushroom four times and flipped each one.
For this image, I applied Topaz Glow after I duplicated/flipped the lightpainted mushroom four times.
For this image, I applied Topaz Glow after I duplicated/flipped the lightpainted mushroom four times.
Artichokes have a lot of inherent texture, but lightpainting them really makes the image look three dimensional and painterly. 127 half-second frames, stacked in-camera on lighten blend mode. f11 ISO 200
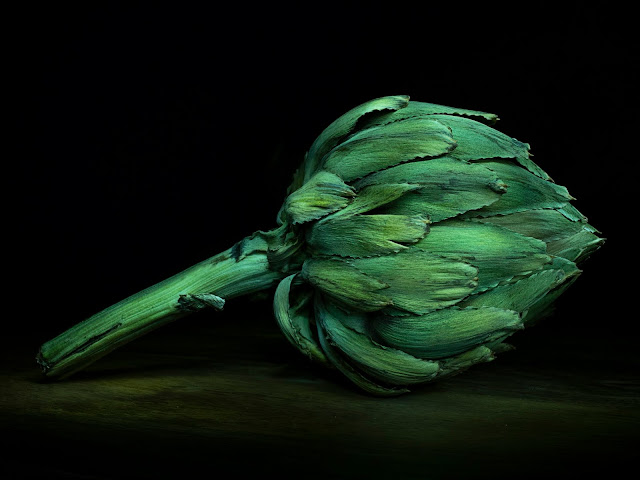
Artichokes have a lot of inherent texture, but lightpainting them really makes the image look three dimensional and painterly.
- The setup can be done anywhere, here it is on my dryer, a $5 black science poster board from Staples and a $1 black base from the dollar store. A microfiber cloth is useful to keep dust off the base.
- Lighting: Take an empty toilet roll and cut a bevel in one end and place black gaffers tape or electrical tape all over it. Or purchase a flexible flashlight https://amzn.to/2wzr5EN
- Light paint from the side, at a 90-degree angle, do not light paint from the camera, that will give flat light (flat light is great for photographing women's face, but we want texture in our light painted subjects)
Join our email list and get content like this and more sign up here http://tinyurl.com/cuchara-photolist


